
autoLink
![]() Click the icon for a Video Example (requires internet connection)
Click the icon for a Video Example (requires internet connection)
autoLink allows the user to place “smart” annotation symbols within the Revit project referencing a specific view detail and sheet number. These symbols are then linked to the specific detail and updated during each save, sync, or print of the project. AutoLinks can be used in place of text notes or in a variety of locations where a section, elevation, callout, or a view reference object is not suitable.
 Placing autoLinks
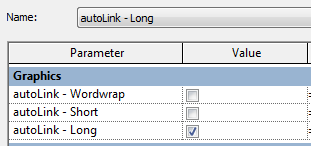
 To get started with autoLink you must first make sure that you adjust the autoLink settings to point to the element category and parameter name. By default, autoLink is set to point to a generic annotation with a parameter 'autoLink'.
An easy way to place autoLink symbols for the first time is to use the 'Place autoLink' button on the workFlow panel. This command will load the autoLink generic annotation symbol from the File Location directory in autoLink settings (if necessary) and will allow you to place autoLinks with a single click. You can also assign autoLinks to an instance parameter within an element and it will allow you to create a link to a reference view. This is useful for numerous applications, including door schedules and linking actual elements to their drafting view details.
Once an autoLink has been placed, simply select it and edit the reference text just like you would with a Revit text field. If you are referencing an element, simply modify the text instance parameter in that element and sync/save to set the link. The program will search for any viewport changes and update your autoLink reference to maintain an accurate link.
You can now add extra text to the parameter (For example: Sim. or O.H.) and the program will search for the x/xxx text format and ignore the rest of the text. This also allows you greater flexibility to add descriptor text before and after the reference (i.e. Bike Rack).
autoLink Settings

The autoLink settings dialog consists of five primary settings:
- Category/Parameter list- This list shows you the current categories and parameters that autoLink is watching. By default, to avoid accidental changes, this list is unchangeable until you uncheck “Set Parameters to Read-only”. You will notice that you have the option to specify whether or not an autoLink parameter should look in Linked Files for view reference changes. To edit or add a specific Parameter, select the Modify Parameters group below.
- Modify Parameters -Use this group of buttons (Add / Modify / Remove) to make changes to the Parameter list. Once you have made modifications to a parameter it will be checked for the existence of that particular parameter name (to help reduce spelling errors or incorrect Categories). Keep in mind that if you add a category that did not exist previously, you will need to restart Revit before autoLink can track this new parameter properly.
Set Parameters to Read-Only - This checkbox is just another safe guard to prevent users at a firm from modifying the parameter list (to maintain the company standard). If the File Locations are set to a central settings file on the server, the parameter list will change dynamically as company standards change. - File Locations - There are two specific directory locations:
- Settings File Directory - Unless you are working primarily from your own computer, you will want to set up a central version of the autoLink settings file on your company server. Each user has their own XML settings file locally for autoLink and this allows you a bit of flexibility.
- autoLink Family Directory - Point this to your company standard Revit family library to always load the most current autoLink Family Symbol.
- View Reference Settings
- Temporarily Disable autoLink - If you prefer not to update your autoLinks every time you Save/Sync or Print, check this box and you can temporarily suspend the automatic updating capabilities.
- Show autoLink update list - Leave this checked if you would like to be notified of every autoLink or viewport that has been modified, otherwise you can uncheck this box for silent mode.
- When View Reference not found - This setting controls how autoLink behaves when a link is not found. This can happen if the user mis-types a link, when the view that is linked is removed from the sheet, or when the view is deleted. There are 3 options for dealing with broken links:
- Default Text - This will change the autoLink to display whatever text is in the 'Default Link' field (x/xxx) rather than an actual link.
- Previous autoLink - This option will revert back to the previous correct autoLink (if one is available).
- No Change - This option will continue to display the autoLink text even though it is incorrect. If the “Show Error Message” checkbox is checked, the user will be reminded that this autoLink is incorrect during each update.
- Update autoLinks - Push this button to manually update the autoLinks in a project.
Customizing autoLink Symbols
It is very simple to create or edit an autoLink parameter. To modify a family component, here are the steps:
- Create a text parameter that autoLink will use to track viewport changes; this parameter must be created as an instance parameter.
- Adjust the autoLink settings to reference the above parameter.
- You will probably need to create a few family types to cover different widths of text for generic annotation families. The current autoLink symbol uses visibility parameters to turn on/off different text corresponding to text width.
- Now you can simply save the family as a new family component and load it into your test project. The only limitation to creating your own family component is that parameters must be instance or project parameters.
Customizing autoLink parameters
Similar to adjusting autoLink families, customizing autoLink parameters is a very simple process. The important part is making sure the element has an instance parameter (or Shared/Project parameter) and that the name of the parameter is spelled correctly (also pay attention to the Capital letters).
NEW Parameter extensions
Now in v3.0, there are a few additional parameter extensions to allow a bit more customization with autoLink. By default, Parameter extensions work like so:
<Parameter name> + Detail will give you the detail number only
<Parameter name> + Sheet will give you the sheet number only
<Parameter name> + Viewname will give you the name of the view
So, for example, if you add a parameter to your family (or project parameter) called autoLink Viewname, you will find that autoLink fills in this parameter with the View name of the view reference. Obviously these parameter extensions are for informational purposes only (if you change the View name it won’t actually modify the view reference). Keep an eye out for future versions of autoLink for the option to assign a view that has not yet been placed on a sheet!