
dimensionCheck
![]() Click the icon for a Video Example (requires internet connection)
Click the icon for a Video Example (requires internet connection)
dimensionCheck is a command that allows the user to check selected categories in the active view and (optionally) all sub-views and find which elements are not dimensioned. It is designed primarily to be a quality control check assistant for dimension plans.
Starting a check
 To start a check, simply activate the command from the 'Dimension Check' button on the workFlow panel. This will bring up the main dialog which will allow you to select options and continue.
Main Dialog
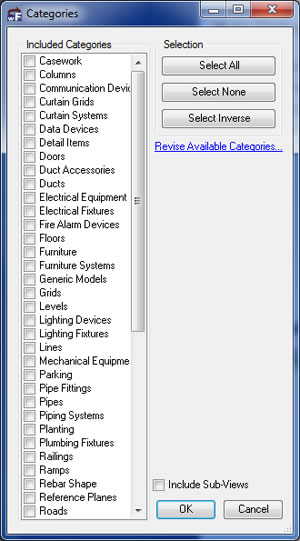 The main dialog for dimensionCheck looks like the dialog to the right and has the following main functions:
- Included categories - Determines which categories will be included in this check. For example if we are checking that all walls are located, we could check only the 'Walls' category.
- Selection Tools - These are simply tools to help you more quickly select the combination of categories desired.
- Revise Available Categories - See the related section below.
- Include Sub-Views - If unchecked, dimensionCheck will check only the active view for dimensions when determining if an element has been dimensioned or not. If checked, dimensionCheck will check the active view and all views called out in the active view (i.e. enlarged plans).
Once you have selected the options you want, press the 'OK' button to find un-dimensioned elements.
Analyzing Results
Upon pressing the OK button on the main dialog you will be presented either with a dialog stating that there were no non-dimensioned elements found using the specified options, or a dialog listing the non-dimensioned elements.
The non-dimensioned elements dialog is non-modal, so it can remain open while doing additional work in the Revit interface. This dialog is designed to be able to show the user the problem element, allow the user to dimension the element, and then move to the next element. The non-dimensioned elements dialog contains the following functions:
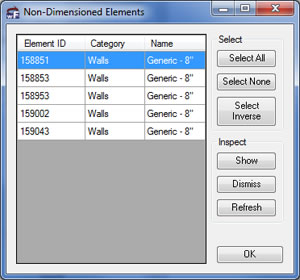 Element List - This portion of the dialog simply lists the Element ID, Category, and Name of all non-dimensioned elements.
- Selection Tools - This section is designed to help more efficiently select the elements of interest from the element list.
- Inspection Tools - These tools are designed to help the user effectively work with the list of elements found. There are three tools available:
- Show - This selects and shows the element(s) selected in the element list in the Revit interface, allowing quick location of the offending element.
- Dismiss - This button removes the currently selected element(s) from the element list.
- Refresh - This button re-runs the check using the original settings and updates the element list with the new results.
Revise Available Categories
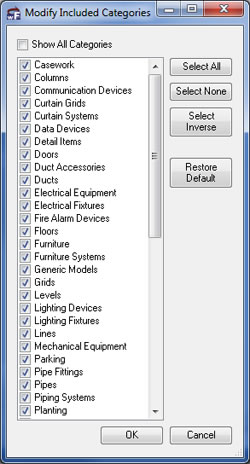 For new installations, the main dialog lists a default set of categories that represent a broad range of categories that can be dimensioned in Revit. However, many offices will probably never need to check dimensions for all of these categories. Because of this, the list of available categories can be customized by using the 'Revise Available Categories' link on the main interface.
This will bring up the Modify Included Categories dialog that allows selection of what categories should be available. Simply select which categories are to be available using the checkboxes and select 'OK'.
This setting will persist from session to session, so setting this once will cause only relevant categories to be displayed until the setting is changed again.