
viewRename
![]() Click the icon for a Video Example (requires internet connection)
Click the icon for a Video Example (requires internet connection)
viewRename is an addin that allows the user to define a view naming standard and automatically name views based on the standard.
viewRename Settings
The viewRename settings dialog consists of three primary regions:
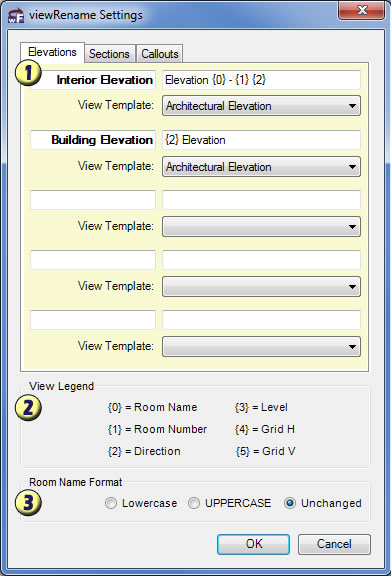
- View Types / View Name / View Template – There are now 3 tabs (Elevations, Sections, Callouts) to allow customization o
 f all 3 view types.
- The text in bold letters (Interior Elevation and Building Elevation) are Revit View Types. If you have custom view types, make sure you type them in exactly as the show in the properties. This allows you some flexibility in setting up standard view names if your firm standard has elevations for casework or something else.
- The next field (Example: Elevation {0} - {1} {2}) defines the structure of the View Name as defined by the View Legend. For example, {0} becomes the room name and {1} becomes the room number. When you rename an existing view, the add-in will all of the information in the room and fill in the {blanks}.
- The final field below is a list box to define the view template. Many firms have their own view template strategy and this can be quite helpful for keeping views consistent in appearance. If you have no view template that you would like to default the view to just select <None> and it won’t affect the view template.
- View Legend – These are the 6 dynamic options driven from the model components that you may use in the view name structure.
- Room Name Format – This is a custom setting that allows you to override the capitalization of the room name to keep with the firm standard.
viewRename Existing View
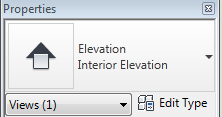
After you have placed a few views (elevation, section, or callout) you will be ready to update the view names to your firm standard. Simply select this button and pick the view you would like to rename. Keep in mind that you will only be able to select actual views (not references of other views such as "Sim.")
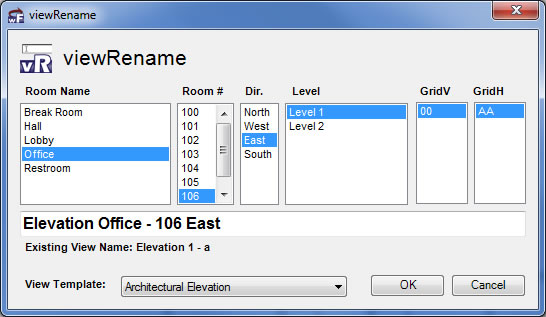
The viewRename dialog will automatically select the view name settings that correspond to the view. At this point you can always make changes if the view name is incorrect by clicking on the list boxes or the check boxes or even manually typing the view name.
You may then specify the view template to assign to the view. In Revit 2012, this will assign the default view template. In Revit 2013, this will assign the actual view template (and should modify the view settings to correspond).
Once you are satisfied with the view name, just click on the OK button to set the name.
After you have renamed the view, you will have the option to select another view and continue renaming views. Once you are done you can simply escape out of the command and review the project browser for other non-standard view names.
Instant Updater
One of the best ways to enforce a view naming standard is to automatically name views as they are created. This is possible with viewRename and actually works quite efficiently.
However, due to the potential for an updater warning screen to appear to users that do not have viewRename installed, the updater has been disabled by default. If you would like to test this function, it is recommended you not try it on active projects unless every user in the office has this add-in installed on their computer.
First, save and close the Revit program. To update your viewRename settings file, open the following directory: “C:\Users\{username}\AppData\Roaming\Revolution Design\Workflow\viewRename” and open viewRename_settings.xml in a text editor (Notepad).
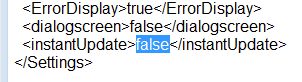 Now you just find the <instantUpdate> setting and change the text from false to true. Save and close the file and open Revit again.
![]()
![]()